
Measuring a radiator is not just measuring the metal panel on the wall. For a replacement to fit neatly, you need the radiator size, the pipe positions, the valve allowance and enough heat output for the room. Miss one of those and a simple swap can become pipework changes, poor heating or an awkward-looking installation.
The safest approach is to record dimensions in millimetres, sketch the wall and compare your figures with the technical drawing for the radiator you plan to buy.
Key Takeaways
- Measure height, width, pipe centres and wall-to-pipe distance.
- Pipe centres are measured from the centre of one pipe to the centre of the other.
- Valve size and connection type affect whether a radiator will fit existing pipework.
- Physical size is not the same as heat output.
- Check brackets, wall strength and clearances before ordering.
The Four Measurements To Take
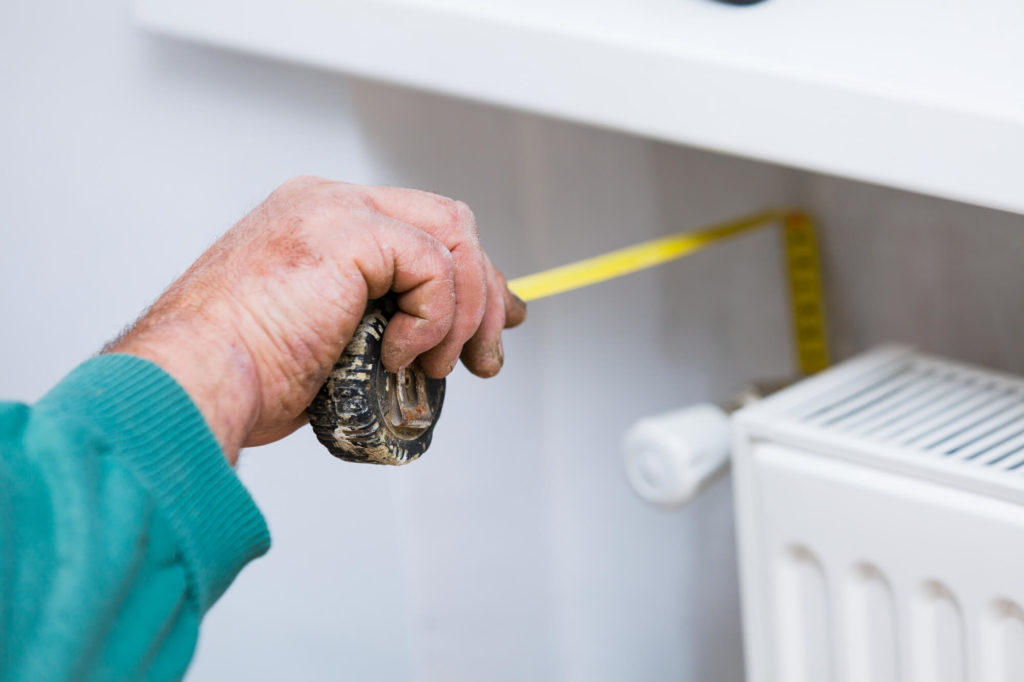
Use a tape measure, notebook and a quick sketch. Measure the height from the lowest to highest point of the radiator, then the width from side to side. Next, measure the distance between the two pipe centres. Finally, measure from the wall to the centre of each pipe.
Write down which side the valves are on and whether pipes come from the floor or wall. Photos help when comparing products online or asking an installer for advice.
Measure twice, then measure the pipe centres again separately. Radiator width is easy to see, but pipe position is what decides whether the replacement connects cleanly. If the existing radiator is partly hidden by furniture or a cover, remove the obstruction before measuring rather than guessing from the visible edge.
Pipe Centres And Valve Allowance
Pipe centres cause many ordering mistakes. The measurement is not simply the radiator width. It includes the distance between the pipe centres once valves and tails are fitted. Some radiator suppliers give a pipe-centre allowance, while others expect you to calculate it from the radiator width and valve drawings.
If you are changing from a standard panel radiator to a designer radiator, towel rail or vertical radiator, do not assume the pipework will align. Our guide to horizontal and vertical radiators explains some of the layout trade-offs.
Measure Heat Output, Not Just Size
A radiator needs to fit the room thermally as well as physically. If the existing radiator leaves the room cold, replacing it with the same size may repeat the problem. Use a BTU or wattage estimate and consider insulation, ceiling height, glazing and whether the room has external walls.
This matters even more with heat pumps and other lower-temperature systems, where larger radiators may be needed to deliver enough heat at lower flow temperatures. For room sizing, use our guide on what size radiators you need.
Do not compare radiators by dimensions alone. A single-panel radiator, double-panel radiator and convector radiator can have very different outputs even when the height and width look similar. Check the listed output at the flow temperature relevant to your heating system, especially if you are planning future boiler or heat pump changes.
Radiator Measuring Checklist
| Measurement | How To Take It | Why It Matters |
|---|---|---|
| Height | Bottom to top of radiator | Wall fit and visual proportion |
| Width | Left edge to right edge | Available wall space |
| Pipe centres | Centre of left pipe to centre of right pipe | Pipework alignment |
| Wall to pipe | Wall surface to pipe centre | Valve and bracket fit |
Keep the checklist with the product link or supplier quote so you can compare like with like before ordering.
Valve Allowance, Projection And Connection Type
Radiator measurements become more useful when you include the parts that sit outside the panel. Side-entry radiators normally need valve tails and valves on both ends, so the pipe centres are wider than the radiator itself. Many radiator suppliers use a rough allowance of around 40mm per side for typical valves, but that is not universal. Decorative valves, angled valves, corner valves and thermostatic radiator valves can all change the final measurement.
Wall projection is another easily missed measurement. Measure from the wall surface to the centre of the pipes and, if possible, from the wall to the front face of the existing radiator. A deeper double-panel radiator may fit the pipe centres but project too far into a narrow hallway. A designer radiator may sit closer to the wall but need different brackets. These details matter before you order, especially if furniture, curtains, doors or skirting boards are close by.
Connection type also matters. Standard panel radiators often connect at the sides, towel rails may connect from underneath, and some vertical designer radiators have centre connections. Do not assume a radiator of the same width will use the same pipe positions. Compare your measurements with the exact technical drawing, including the valve set you plan to use, before changing pipework.
Measuring For Different Radiator Types
A like-for-like panel radiator is the simplest case: same height, same width, same connection style and similar heat output. Even then, check bracket positions because a new radiator may not hang on the old brackets. For a vertical radiator, height, wall strength and bracket fixing become more important than width alone. Tall radiators concentrate weight over a smaller wall area, so plasterboard fixings, masonry condition and manufacturer bracket instructions matter.
For towel radiators, do not focus only on the outside dimensions. Look at pipe entry, floor clearance, towel spacing and heat output. A towel rail that looks large can still produce less heat than a compact double-panel radiator, so it may not be enough as the only heat source in a cold bathroom. For cast iron or column radiators, wait for the exact unit and valves before finalising pipework where possible. Manufacturing tolerances and valve choices can make small differences that matter during installation.
Common Measuring Mistakes
| Mistake | Why It Causes Trouble | Better Approach |
|---|---|---|
| Measuring pipe edges instead of centres | The replacement may not line up with the valves | Measure centre to centre, then compare with the drawing |
| Ignoring valve allowance | The radiator width alone does not equal pipe centres | Add the correct allowance for the exact valve type |
| Buying by size only | The room may still be underheated | Check BTU or wattage as well as physical dimensions |
| Assuming old brackets fit | Bracket positions vary between models | Use the brackets and template supplied with the new radiator |
| Forgetting wall projection | The radiator can stick out too far or clash with furniture | Measure depth, pipe position and available clearance |
Take photos from straight on and from each valve end before you shop. A photo with a tape measure in view can save a lot of uncertainty if you later ask a supplier or plumber to check compatibility. Keep the measurements in millimetres and label them clearly; mixing pipe centres, radiator width and valve allowances is where many ordering mistakes begin.
Expert Insights From Our Heating Engineers
Our engineers recommend taking measurements twice and checking them against the exact product drawing, not a generic radiator image. The biggest installation delays come from pipe centres, bracket positions and valve allowances being assumed rather than measured.
If pipework is being moved, do not set it permanently until the radiator and valves are on site. Small differences between products can matter, especially with designer radiators, cast iron styles and decorative valves.
They also recommend measuring the room problem, not just the old radiator. If the old radiator was hidden behind a sofa, blocked by long curtains or too small for an exposed wall, copying its dimensions preserves the weakness. Measure the available wall, but also think about where heat can actually circulate.
Summing Up
Measure a radiator by recording the panel size, pipe centres, wall-to-pipe distance, valve type, projection, bracket considerations and heat output requirement. The radiator itself is only part of the fit; the valves, pipework, wall and room heat demand all decide whether the replacement will be straightforward.
A good replacement is the one that fits the wall, lines up with the pipework and heats the room properly. If you are changing radiator style, moving from horizontal to vertical, fitting a towel rail or upgrading for lower flow temperatures, treat the job as a fresh sizing exercise rather than a simple measurement copy. When in doubt, wait until the exact radiator and valves are on site before committing to pipework changes.
Frequently Asked Questions
What Measurements Do I Need For A Replacement Radiator?
Measure the radiator height, radiator width, distance between pipe centres and distance from the wall to the pipe centres. Also note valve type, pipe direction, available wall space and desired heat output. A radiator can match the wall size but still fail if the pipe centres do not line up.
How Do You Measure Radiator Pipe Centres?
Measure from the centre of one pipe to the centre of the other pipe, not from the outside edges. For side-entry radiators, pipe centres are influenced by radiator width plus valve tail allowances. Manufacturers often provide diagrams, so compare your measurement with the exact radiator and valve combination.
Should I Buy The Same Size Radiator?
Buying the same physical size is easiest if the current radiator heats the room well and the pipework is staying in place. If the room is cold, insulation has changed or you are moving to lower flow temperatures, heat output matters more than matching the old dimensions.
How Much Space Should Be Around A Radiator?
Leave enough space for valves, airflow, cleaning and safe installation. Avoid cramming a radiator tightly behind furniture or under deep covers because heat output can suffer. Manufacturer instructions vary, so use their clearance guidance as the final reference.
Do Vertical Radiators Measure The Same Way?
The same basic measurements apply, but vertical radiators make height, wall strength, bracket positions and pipe entry more important. They may have different connection layouts from horizontal radiators, so check the technical drawing carefully before moving pipework.
Can I Measure For A Radiator Without Removing The Old One?
Yes, you can take the main dimensions with the old radiator in place. However, wall-to-pipe distances, bracket positions and valve allowances are easier to confirm when you can see the pipework clearly. If precision matters, wait for the new radiator and valves before final pipe adjustments.
Updated