Replacing a radiator can be straightforward when the new one is a genuine like-for-like swap. It becomes much less straightforward when the pipe centres differ, valves are seized, brackets do not line up or the heating system loses pressure after refill. Planning is what separates a clean afternoon job from a wet carpet.
This guide covers the practical sequence and the decisions to make before you start, including when the sensible answer is to use a plumber.
Contents
- 1 Key Takeaways
- 2 Before You Buy The Replacement
- 3 Step-By-Step Radiator Replacement
- 4 Valves, Brackets And Refill Checks
- 5 Common Problems After Replacement
- 6 Like-For-Like Swap Or Pipework Change?
- 7 Tools, Materials And Preparation
- 8 When To Use A Plumber
- 9 Expert Insights From Our Heating Engineers
- 10 Summing Up
- 11 Frequently Asked Questions
Key Takeaways
- Measure the radiator and pipe centres before buying a replacement.
- Close both valves and drain the radiator before removing it.
- Protect floors because radiator water can be dirty and stain.
- Check every joint slowly during refill.
- Bleed, repressurise and rebalance the system afterwards if needed.
Before You Buy The Replacement
Measure height, width, pipe centres and wall-to-pipe distance. Check whether pipes come from the floor or wall, and note valve type. If you have not measured yet, use our guide on how to measure a radiator before ordering.
Also check heat output. A radiator that physically fits may still be too small for the room, especially if the old radiator struggled or you are planning lower flow temperatures.
Open the packaging and check the new radiator before removing the old one. Confirm the brackets, bleed plug, blanking plug and instructions are present. Check for transit damage and compare the connection positions with your measurements. Discovering a mismatch after the old radiator is drained is how a tidy job turns into an urgent plumbing problem.
Step-By-Step Radiator Replacement
- Turn off the heating and let the radiator cool.
- Close the thermostatic or manual valve and the lockshield, counting lockshield turns.
- Place towels and a tray under the valve unions.
- Open the bleed valve to release pressure.
- Loosen one union carefully and drain the radiator into a container.
- Lift the radiator off the brackets with help.
- Fit brackets for the new radiator using the supplied measurements.
- Prepare valve tails and connect the radiator without cross-threading.
- Open valves slowly and check for leaks.
- Bleed the radiator and check system pressure.
Keep the old radiator upright as much as possible when carrying it out. Even after draining, dirty water can sit in the bottom channel and spill from the valve openings. Cap or cover the ends if you need to move through carpeted rooms. If the radiator is heavy, awkward or above ground floor level, use two people rather than risking twisted pipework, damaged walls or injury.
Valves, Brackets And Refill Checks
Old valves are often the weak point. If a valve weeps, will not close or feels loose in the pipework, replacing the radiator without dealing with the valve may leave you with the same leak risk. If you only need to isolate first, our guide on isolating a radiator covers the valve steps in more detail.
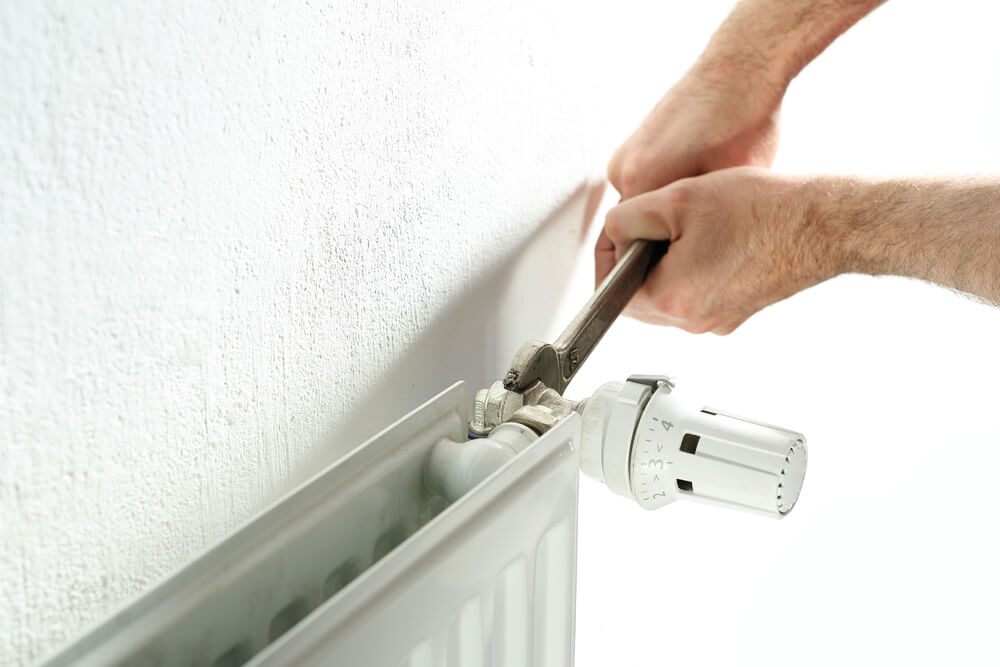
During refill, open valves slowly and dry each joint with tissue. Look for moisture at valve tails, union nuts, blanking plugs and bleed valves. On a sealed system, repressurise only to the range specified by the boiler manufacturer.
Do not rush to put furniture back. Run the heating, let the radiator warm, then check again as metal expands and joints settle. A tiny weep that is invisible when cold can show itself once the system is hot.
Common Problems After Replacement
| Problem | Likely Cause | Fix |
|---|---|---|
| New radiator stays cold | Air, closed valve or balance issue | Bleed, check valves and rebalance |
| Pressure drops | Leak or air released during bleeding | Inspect joints before topping up again |
| Valve union weeps | Misalignment or loose joint | Support valve and tighten carefully |
| Other rooms heat badly | Lockshield position changed | Balance the system |
Most problems are easier to fix before the radiator is boxed in, painted around or hidden behind furniture. Keep access clear until the system has run through at least one proper heating cycle.
Like-For-Like Swap Or Pipework Change?
A true like-for-like replacement means the new radiator matches the old pipe centres, connection type, approximate projection and heat output. In that situation, the job may involve isolating, draining, lifting off, changing brackets and reconnecting to existing valves. Even then, old valves can refuse to seal, wall plugs can fail and pipework can move when unions are loosened.
If the pipe centres differ, the job becomes more than a radiator swap. Pipes may need cutting, extending, bending or rerouting, and flooring may need lifting. If you are changing from a horizontal radiator to a vertical radiator, or from a panel radiator to a towel rail, check not only the pipe position but also whether the new radiator provides enough heat for the room. Our guide to radiator sizing helps with the heat-output side.
Think about the wall too. A replacement can be heavier than the old unit, especially if you move from a single panel to a double panel or a tall designer radiator. Use suitable fixings for the wall type and follow the bracket layout supplied with the radiator. Do not hang a new radiator on old brackets simply because they look close enough.
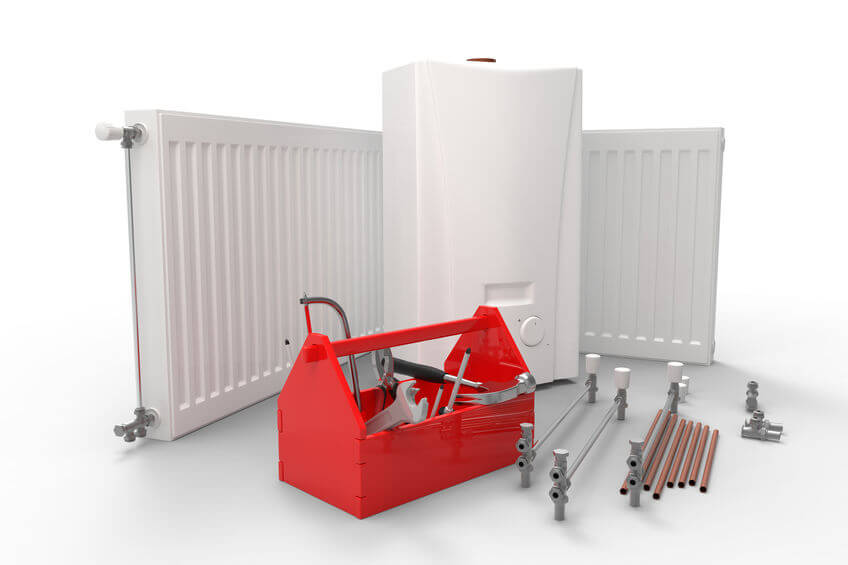
Tools, Materials And Preparation
| Item | Why You Need It | Practical Note |
|---|---|---|
| Two adjustable spanners | To loosen unions while supporting the valve | Using one spanner can twist pipework |
| Radiator key | To release pressure and bleed after refill | Keep it nearby during the whole job |
| Shallow tray and towels | To catch dirty radiator water | Radiator water can stain carpets and walls |
| PTFE tape or jointing materials | For suitable threaded connections | Use only where appropriate for the fitting type |
| Spirit level and drill | For new bracket positions | Check for hidden pipes and cables first |
Prepare the route for lifting the old radiator out before you drain it. Radiators are awkward, and even a partly drained one can still contain enough dirty water to spill when tilted. If the radiator is large, get help. Protect skirting boards, walls and flooring before loosening the first nut.
When To Use A Plumber
Use a plumber if the valves do not isolate, the pipework needs moving, the radiator is very large, the wall condition is poor, the boiler pressure is already unstable or the system has inhibitor, sludge or recurring air problems that need diagnosis. A plumber is also sensible if you are replacing several radiators at once, because balancing, refill and leak checks become more involved.
There is no shame in deciding the job is not a DIY one. The expensive part of a failed radiator replacement is rarely the radiator; it is water damage, damaged pipework, seized valves and repeated callouts after a rushed refill. If you are unsure, get advice before the old radiator is off the wall.
Professional help is particularly worthwhile when the replacement is part of a wider heating upgrade. Moving to lower flow temperatures, changing several radiator sizes or preparing for a heat pump involves heat output and system design, not just swapping panels.
Expert Insights From Our Heating Engineers
Our engineers recommend treating a radiator replacement as a system job, not just a wall job. The radiator must fit, but the system also needs the right water pressure, air removal, inhibitor condition and balance afterwards.
The most common DIY mistake is rushing the refill. Open valves slowly, check with tissue, bleed carefully and watch the pressure gauge. Five extra minutes at this stage catches small weeps before they become stains or plaster damage.
They also advise keeping the heating off until you have checked cold joints first. Once you are confident nothing is weeping cold, warm the system and check again. That two-stage check is much safer than assuming a dry-looking joint is finished.
Summing Up
To replace a radiator, measure accurately, isolate both valves, drain the radiator, fit the new unit securely and refill slowly while checking for leaks. A like-for-like swap can be manageable when the valves are sound, the pipe centres match and the wall can take the new brackets.
The job becomes more technical when pipework changes, valves fail, heat output changes or boiler pressure behaves unpredictably. Plan the replacement as part of the heating system, not just a decorative wall upgrade, and take your time during refill, bleeding and balancing. Keep checking after the system warms up, because small leaks often appear only when joints expand under heat and pressure.
Frequently Asked Questions
Can I Replace A Radiator Myself?
A like-for-like radiator swap can be a DIY job for someone confident with plumbing basics, provided the valves isolate properly and pipework does not need moving. If the radiator size, pipe centres, valves or system layout are changing, the job becomes more complex and a plumber may be better value.
Do I Need To Drain The Whole System?
Not always. If both radiator valves isolate properly, you can usually drain just the radiator being replaced. If valves are faulty, pipework is changing or several radiators are being replaced, part or all of the system may need draining. Always prepare for more water than expected.
Should I Replace Radiator Valves At The Same Time?
It is often sensible to replace old, leaking or stiff valves while the radiator is off, especially if you want thermostatic control. However, valve replacement can require more draining and care than the radiator swap itself. Do not keep old valves simply because they avoided work today.
How Do I Stop A New Radiator Leaking?
Use the correct fittings, do not cross-thread valve tails, support the valve while tightening, avoid overtightening and check every joint during refill. Small weeps often show at valve unions, tails or bleed plugs. Dry each joint with tissue to spot moisture before calling the job finished.
Will A New Radiator Need Balancing?
Yes, it may. Even if the radiator is similar, flow through the system can change after replacement. Reopen the lockshield to its recorded position, bleed the radiator, warm the system and check whether other rooms still heat evenly. Balance adjustments may be needed.
Can I Fit A Bigger Radiator Without Moving Pipes?
Sometimes, but only if the pipe centres and valve allowances work. A larger radiator may need pipework changes, new brackets and a heat-output check. Measure carefully before buying, and remember that physical size, pipe alignment and heat output are three different requirements.
Updated